I’ve been working from home since the pandemic, and my desk area is a little bit crowded – I’ve got a big monitor attached to my work laptop as a second screen, my keyboard and my home Mac Mini, a backup drive and my mousing area, plus two pen cups, notepads, some miscellaneous moisturizers and knickknacks, and scissors as well as clippers for the cats’ claws. I am definitely in need of a little more space, but my desk is the size my desk is, and I don’t want to replace it. Time for an organizer, preferably one that can hang on the wall so it doesn’t take any desk space itself.
I started by looking on Amazon and Etsy for ideas of shapes and structures, and found this amazing piece. I really liked the circular structure with the shelves projecting out from it, particularly since the circle echoes the cat tree platforms and mobile that are also in my studio space.
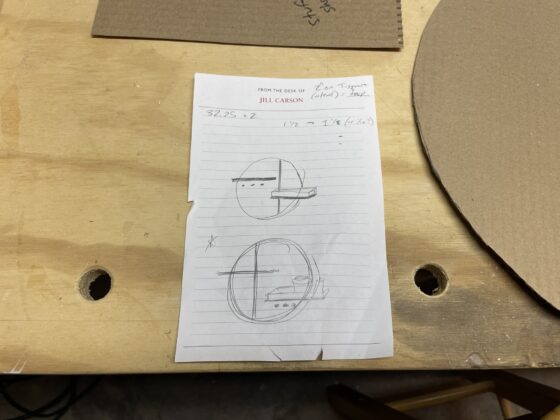
To figure out the size, I laid out the main items I wanted to get off the desk: two pen cups, my fountain pens (which do better stored horizontally), and the scissors. I made a cardboard mockup first, so I traced around the pen cups and my fountain pens to estimate the shelf sizes, and then figured out how big the backing circle should be to hold those shelves. Once I had a size and configuration I liked, I moved on to building it in wood.
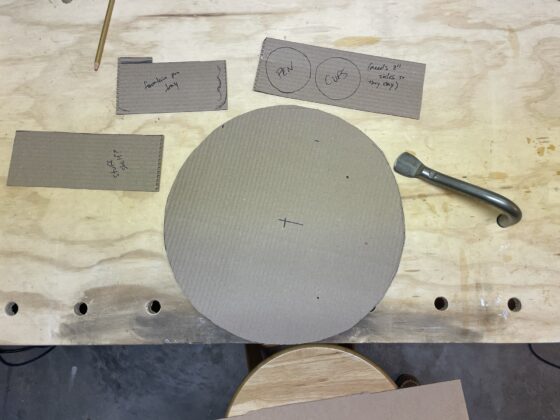
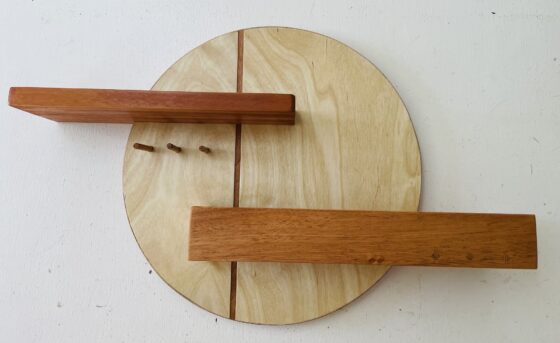
I wanted a little bit of fancy detail – an inlay strip of mahogany I had left over from an earlier project, just to give it something a little special. So I sketched some rough layouts for the shelves, pegs to hang scissors from, and the stripe, to figure out which one felt balanced.
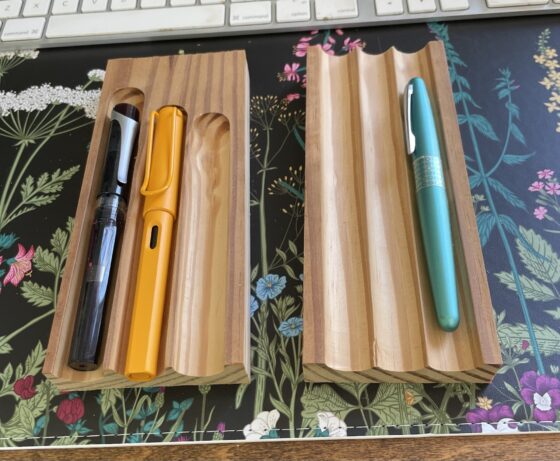
Then I cut the circle out of some leftover birch plywood with a jigsaw, routed a thin groove into it, and glued my inlay in. I tested a few pen tray ideas in some scrap pine, as well.
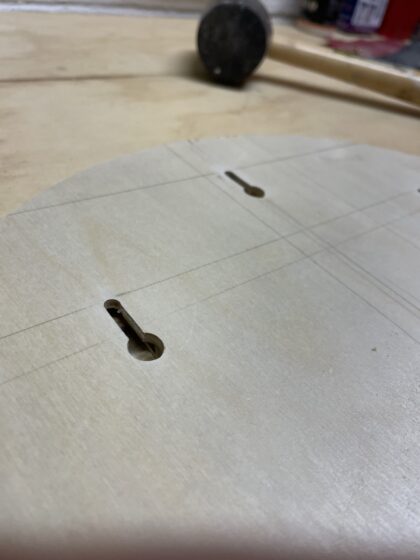
I got to buy a new router bit for the pen grooves, which is always fun. I actually got two new bits on this project, since I bought a keyhole bit so I could hang it flush to the wall. I went ahead and cut the hanging holes before I started working on the shelves.
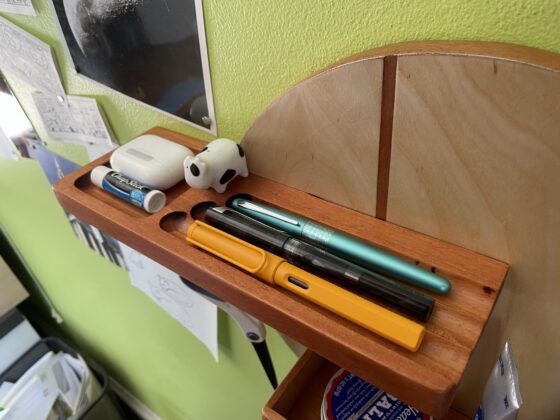
Once I had the inlay in, I realized it might look nice to have the shelves also be mahogany, to make a more intentional two-toned look. So I bought a couple of mahogany boards, one thick enough to rout pen grooves into, that was also big enough to provide the bottom of the second shelf, and one thin one for the walls of the second shelf. Then I cut the shelves to size, routed the pen grooves and a small “dish” into one of the boards, and attached the walls to the second shelf. The shelves also both have a notch taken out of the back edge so that I could attach them to the base in a routed slot.
I added three dowel pegs under the first shelf to hang stuff off of – they’re pine since I don’t have mahogany dowel, and I kind of like how they came out. I also did a little pine dowel detail on the second shelf, drilling three holes through the front wall into the shelf base, so it echoes the three pegs under the first shelf – sadly, the pine end grain doesn’t show as much contrast to the mahogany as I’d hoped. Ah well, I’m always learning.
Once I’d tested the fit of the shelves, I realized that the whole piece would look nicer if I edged-banded the plywood circle – so I bought mahogany edge banding as well and ironed it on.
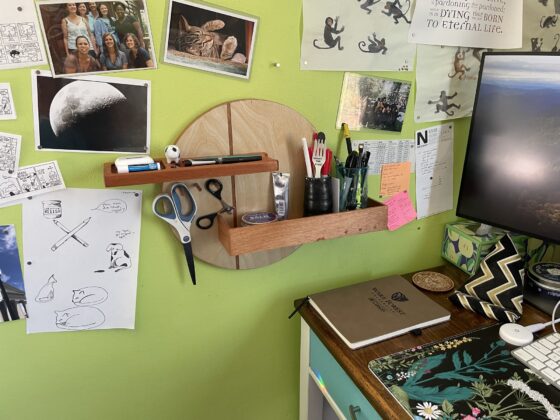
Then I varnished all the pieces – separately, since I decided I’d like the possibility of switching out the shelves at some point in the future. Once everything dried, I put it all together, hung it on the wall, and loaded it up! It’s working beautifully so far.