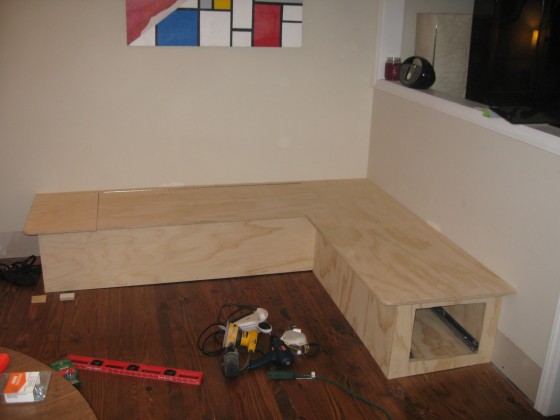
So the last post had the basic frame and sides of the banquette built – now I just had to cover the sides and put the tops on. It turns out I did this in the wrong order – I should’ve attached the tops first, because then I could’ve screwed it in from below, hiding all those screwheads. Luckily, I’m painting the whole thing, so I’ll just spackle over them all. Anyway, I cut the right-hand section to size, sanded down the front edge so it’s a nice smooth curve instead of a sharp edge, and screwed it in. That was the simple side.
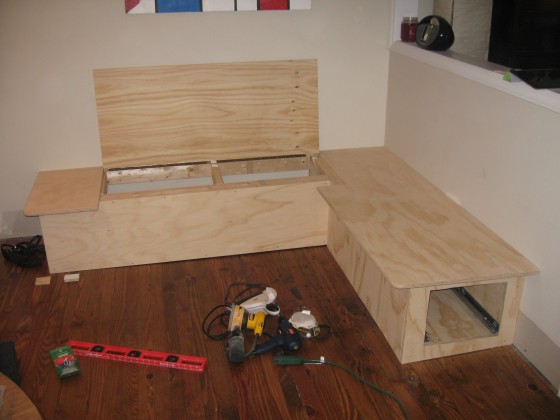
The left-hand side is hinged so you can lift it for storage – I’m not going to put anything I need regularly in there, but maybe my boxes of extra glasses and silverware will end up there. So I bought a continuous hinge, also known as a piano hinge, and cut a section of wood to the same length as the hinge. Then I cut a long 2″ strip off the back edge of my piece, so I’d be attaching that strip to the frame, and then use the hinge to connect the main lid to the strip – otherwise, the hinge would attach directly to the wall, and sheetrock isn’t meant to support weight like that. With all my pieces the right size, I sanded the front edge, and then screwed the pieces all together. This would’ve been a lot simpler with a helper, since holding a 4-foot-long piece of wood in place while you screw a hinge in (with something like 30 tiny screws) isn’t as simple as you might hope. But in the end, I had a fully-constructed banquette.
I haven’t painted it yet because it’s been ridiculously humid here, and since the kitchen is open, I’ll have to barricade the cats into a bedroom while the paint dries. So I’m waiting ’til the weather shifts and my paint will dry in less than a day.


