Category Archives: outdoors

A wide view of the cation, showing a fuller view of the back of the house.

The catio!

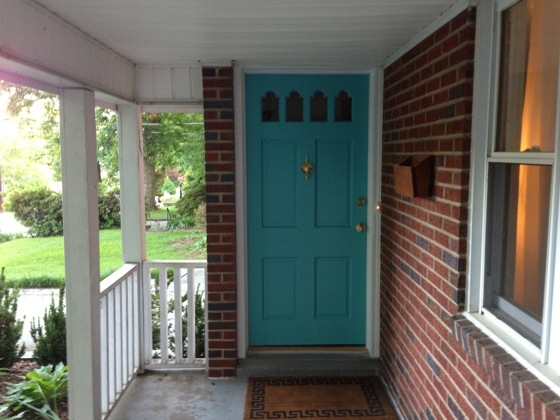
I have cats. Two cats, in fact, which is objectively the correct number of cats – they keep each other entertained, but there aren’t enough of them to start conspiring against you in any major way. Also they can both sit on me at the same time. Anyway, cats! A while back, I built the cat tree, which is still getting daily use.

A recent photo of Pixel and Chaucer on the cat tree.

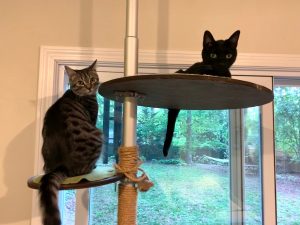
They love the cat tree, partially because it lets them look out the window to the backyard, where they can see all the birds and chipmunks and squirrels and other wildlife they would like to eat. So I started thinking that perhaps they would like to experience the outdoors a little more directly – but I’m not going to let them run free to actually eat all those various animals, or to get run over by a car. So I started investigating catios. Basically, outdoor cages for cats, that connect to the house somehow so they can go in or out as they please. Some people enclose their entire patio to make it cat-friendly, others do a simple window ledge so that the cat can get some fresh air. I decided I wanted to do the window-ledge version, and besides, I had a lot of scrap wood that needed to be used in a project.

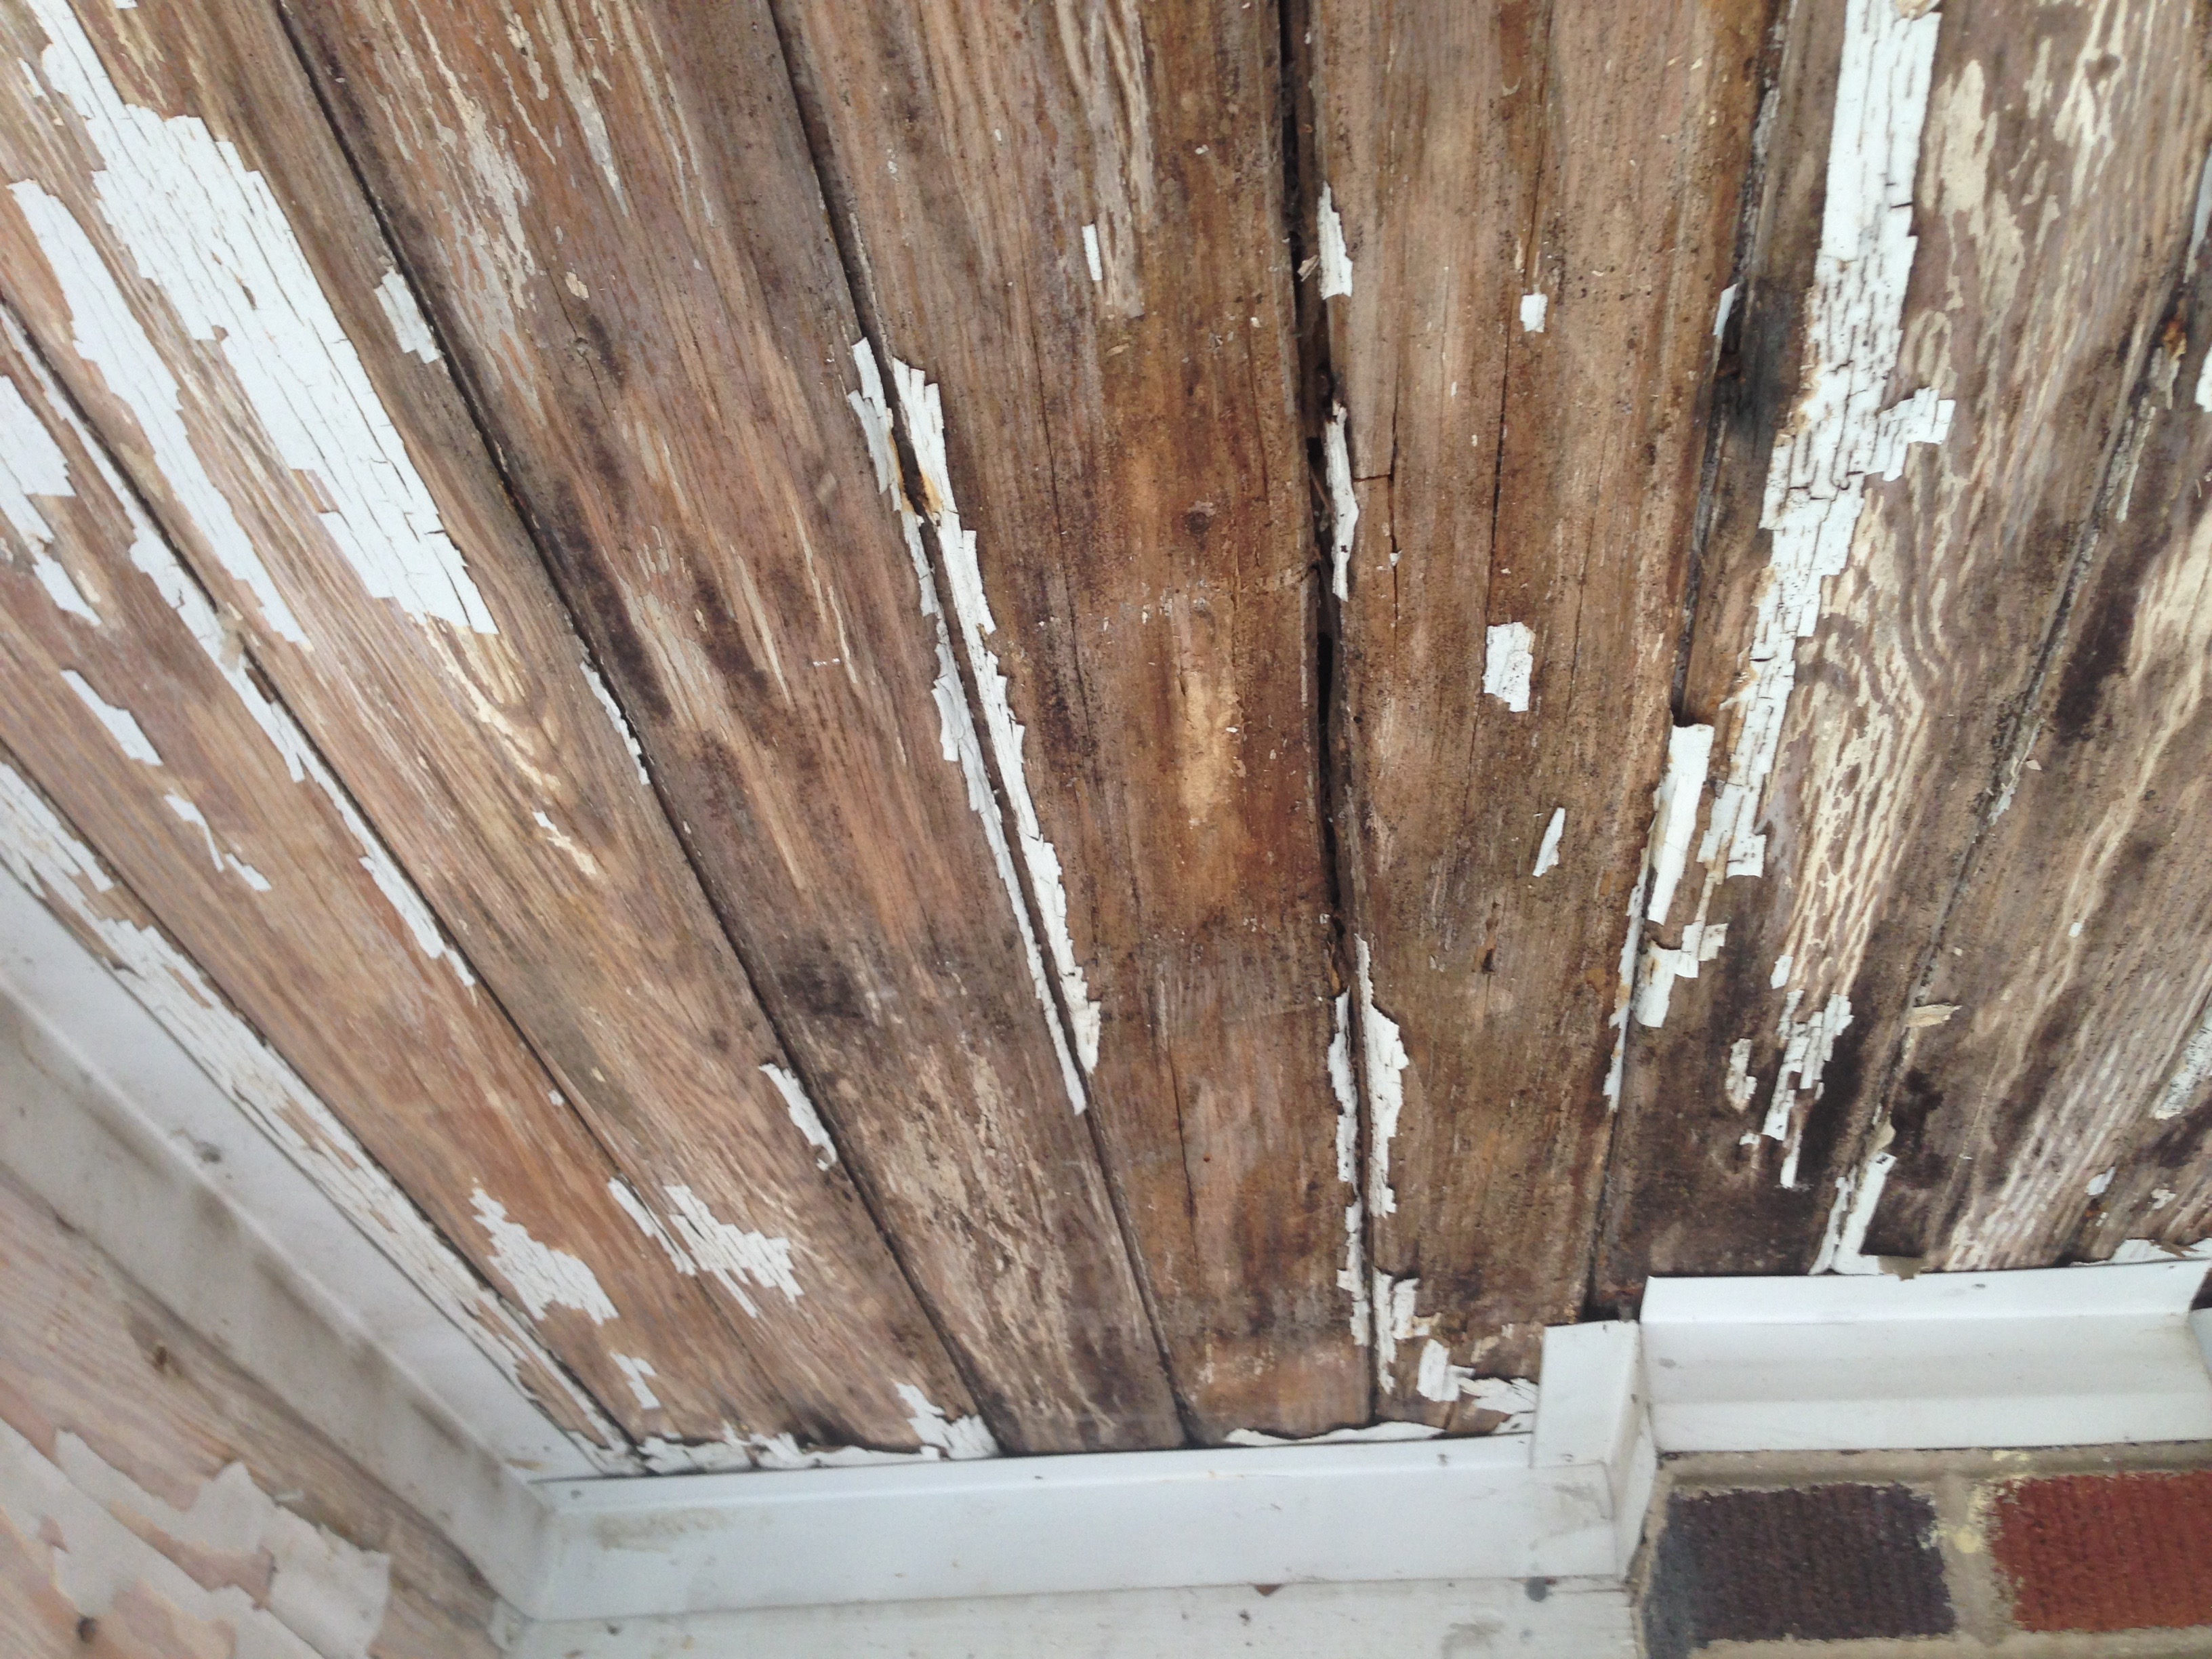
With the goal of using up scrap wood came my dimensions – I had five tongue-and-groove boards left over from the porch ceiling project, so that gave me the depth (a bit more than 14″), and I needed a bit more width to span the window I was working with, so I added on a one-by six to each end, making my full span of floor exactly 70″, which, when combined with a roof overhang of 1″, brought the final length to exactly six feet.

The frame construction was basically a lot of lengths of 2x2s, held together with deck screws, with a 1×3 frame for the roof. I built the sides individually so that I didn’t have to try to carry the whole frame up from my basement workshop, so the floor was one piece, then the front, then the sides and then the roof. In this photo they’re just dry-fitted together to make sure they all fit:

A wooden catio frame on a concrete floor..

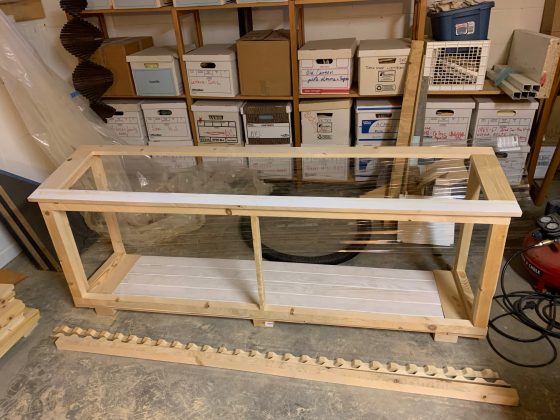
The weird wavy boards at the bottom of the photo are part of the roof construction, the one thing I did actually go buy separately. Rather than letting the rain in, I added a polycarbonate roof – which was definitely the biggest hassle of the construction process, as it required a lot of predrilling for the screws.

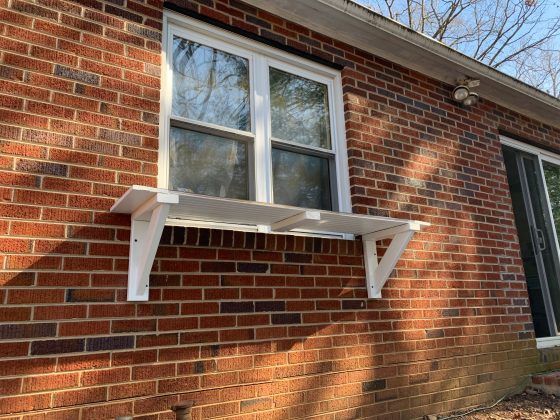
I didn’t take a lot of photos of construction, but here you can see the wall brackets I screwed into my brick house to hold the whole thing up:

A window, mid-construction, with the floor of the catio supported by two white wooden brackets.
The catio, now with the floor and sides attached. You can faintly see the wire fencing that keeps the cat in.

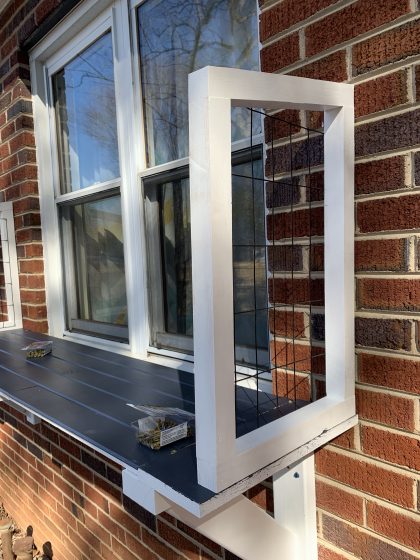
I built the structure in parts, so in that shot, the floor is attached, and in this next one, I’ve added the sides. You can also see the wire fencing that I used to keep the cat inside – it’s 2″x4″ metal fence, which used to be attached to make the chain link fence in my backyard higher. My neighbor has since built a taller, wooden fence that made the wire fencing obsolete, so I repurposed a chunk of it for this. Lots of fun cutting with a Dremel, and then painting with Rustoleum paint – it actually came out much better than it had any right to.

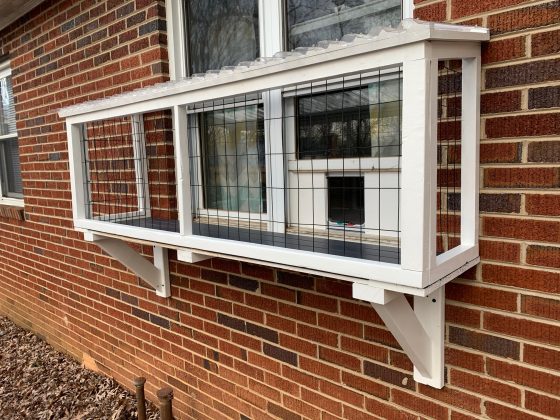
Anyway, so they I put on the front and the top, and then the roof. To give the cats access, I added a cat door to my window, much like a window air conditioner – the window just closes on the panel that holds the cat door, and the cats go in and out without too much air exchange.

The completed catio, with the cat flap visible in the window.

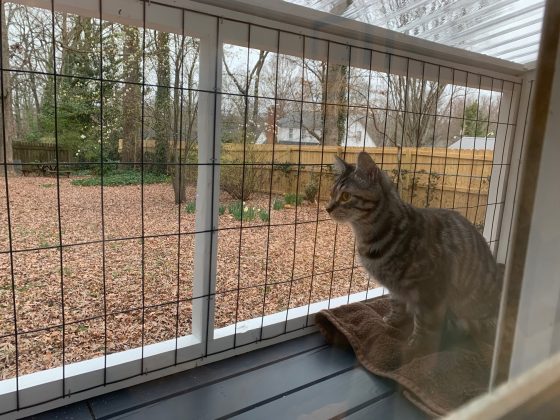
Pixel LOVES it. He spends time out there every morning and afternoon, and particularly likes near dawn – I think there’s more animal activity then, and I’m always asleep and therefore very boring at that time. Chaucer is much more cautious, and has ventured out a couple of times, but is much more content to stay indoors and watch the birds from a safe vantage point behind the glass.

A view from inside the house out through the catio, with Pixel looking very intent in the foreground.

So it’s a very successful catio – gives the cats an outdoor option, used up some scrap wood, and doesn’t look too terrible from the outside, either!

Lighting the porch

It seems like whenever I start a project like this, I have very few opinions about certain elements, and then I end up with very strong opinions. Some parts, I know from the beginning how I want them to turn out, while other parts only get my focus when there’s no other choice. The lighting for the front porch was definitely one of the latter types. There was an existing flush-mount fixture on the front porch which I had only noticed when I had to take it down and put up the Moravian star at Christmastime. I’d sort of assumed I would just put it back up once I got the ceiling done, but the more I looked at it, the less I liked it. I had some idea that I might find another fixture that matched the outdoor post lamp at the top of my stairs, but after searching through hundreds of options online, I still hadn’t found anything I liked. So then I started thinking about other styles entirely.

I’ve always loved the lights at Christmastime – the little white decorative string lights that so many people put on their houses are gorgeous, to me – they’re fun and casual and festive, and they’re great. What if I could do something like that, but have them year-round? I quickly realized that the tiny string lights are mostly not meant for permanent use, but there is an alternative – the kind of string lights restaurants use around their patios or other outdoor spaces. Bigger bulbs, but keeping the casual, fun vibe. So I found a heavy-duty set of string lights, 48 ft long, and got LED Edison-bulb style lamps for it. At first I was thinking I’d just run them around the perimeter of the porch, but then realized that they’d have to start in the middle since that’s where the fixture attaches, so I should create a criss-cross pattern instead. So with 15 small cup hooks, I put up a symmetrical crossing pattern of lights that illuminates my porch perfectly, and even leaves me with an end to attach the Moravian star to when Christmas comes around.

Painting the porch ceiling

Now that the new boards were all in, it was time to scrape the old boards of all their loose paint and then paint the entire ceiling. Scraping shipping paint off of tongue-and-groove over my head turned out to be a process I had very little patience for, so after a very cursory process involving several hours on consecutive evenings, I decided to embrace the bumpiness of old paint as adding character, and went ahead and primed the whole surface. Painting ceilings isn’t that terrible, as long as you have an extension handle for your roller, and a comfortable brush for getting into all of the grooves. My ceiling took three coats – one of primer, and two of exterior paint. I’d originally planned to paint it a light blue, but the paint I was going to use (leftover from the front door) had gone bad, and I realized I wasn’t particularly interested in drawing attention to my porch ceiling, so simple white actually made more sense.

The Dump

This is the first project I’ve had that’s made enough trash to need a trip to the dump. My kitchen demolition was bigger, of course, but my contractor dealt with all the debris from that, to my great relief. For the porch, I’d just made a pile of junk – the four old posts, all the vinyl from the ceiling and surround, and all the railings, plus the pieces of ceiling I took out. It was a pretty impressive pile, and it couldn’t stay on my porch forever. My city gives you two free dump trips as a resident, so I applied for the pass and planned to head out early on Saturday to get rid of the junk.

I borrowed my mom’s car (again – thanks mom!), and loaded it up. Loading it took almost an hour – some of the pieces were pretty heavy, and it took some careful stacking to get it all in. Drove (carefully) out to the landfill, which is about 20 minutes from my house, got to go through the “cars and SUVs” line, bypassing the much longer “trucks and trailers” line, then with a little assistance from the guys directing traffic, backed the car up to a metal ledge leading to very large dumpster. It only took about 10 minutes to unload the car, with a few moments of glee as I shoved a 50-pound chunk of railing over the edge to land with a resounding thump. Once the car was empty, I returned it to my parents’ house and headed home to enjoy my newly clear porch – or rather, to install the rest of my porch ceiling, now without the massive tripping hazard I’d previously been working around.

Repairing a rotten tongue and groove ceiling

This part is the story of how I did this repair badly and then went back and did it right. My initial plan was to just cut off the boards that were rotted and replace them with new boards.

IMG_0980

The flaw in this plan is that tongue and groove is typically installed so that no two boards end at the same place, so having a section of boards all the same length was really conspicuous.

The other flaw in this plan is that modern tongue and groove is not the same width nor thickness as the tongue and groove that was installed on my porch in 1953 when they built the house. So not only did the boards look odd because they all ended at one spot, they also had some awkward gaps to try to make up the difference in width.

Continue reading

Repairing and repainting porch posts and railings

This project should take: a bit of wood filler, a good outdoor primer and outdoor paint, a small brush for all the corners, and maybe a roller if there are enough flat surfaces to warrant it. For me, this project has taken: a large amount of brute force, a crowbar, a post jack, borrowing a bigger car, use of my dad’s table saw, my router… okay, let me back up. On one of the first lovely weekends this spring, I decided to tackle repairing and repainting my front porch posts and railing. One of the posts had seemed a little loose last fall when I was grinding the floor around it, so along with my paint supplies, I gathered some bits of wood to shim it up and got started. An important detail – my porch posts are wrapped in aluminum sheathing, and the ceiling and upper surfaces of the porch are covered in vinyl siding. So my first attempt was just to shove a shim under the edge of the wobbly post. This didn’t work very well – it was hard to get the shim under the aluminum edge, but once it was under, it seemed to do nothing at all. So I went to get the crowbar and pry the aluminum off of the post so I could see what was happening. And when I did that, I found a crumbly mess.

IMG_0975

Yes, the post was rotted. Not holding up any weight whatsoever. Not something I can fix with a shim. Time to learn how to replace a porch post, it seems! I also went ahead and peeled the covering off the other posts, and discovered that three out of the four were rotting. So now the project had become replacing all four porch posts. Once I started peeling aluminum off, though, I kept going, taking down the entire porch ceiling as well. And there I discovered that the ceiling underneath was tongue and groove – with some peeling paint, but a pretty nice ceiling… except for the part near the door, where there had obviously been a roof leak, and the ceiling had rotted. Awesome. So forget the quick repainting job, it’s now time to rebuild the porch! This includes replacing all the porch posts, railings, part of the ceiling, and I still need to paint the floor eventually too. Continue reading

Removing porch floor paint

Way back in August 2013 I wrote “Ignore the peeling paint on the porch floor, that’s a project for another day…” at the end of a post about repainting my front door. That was indeed a project for another day… about a year later. So, fall 2014, I started scraping the paint off of my front porch floor. The porch itself is concrete, but had been painted (I think) red originally, and then gray after that. Both those layers of paint were peeling, though, because once a little concrete is exposed, water can get behind the paint, and then the whole thing peels.

I started by taking a paint scraper to it, and discovered very quickly that while I could get some large chunks of paint up, other bits were stuck very firmly and weren’t going anywhere.

Time for power tools! I tried my palm sander first, with some very rough sandpaper. That was… not effective, pretty much at all. Continue reading

Driveway wall repair and painting

I haven’t done a ton to the house this summer, hence the massive lack of updates. But there is one major project that I just finished. My driveway wall has been looking a bit worse for wear – cracks, water/mud stains, a few loose blocks, and lots of chipping and peeling paint. So this summer, I finally tackled it , with lots of parental assistance. First I rented a pressure washer to clean the whole thing thoroughly. It took a couple hours to wash the entire wall, but it was incredibly satisfying to see it get clean. We also took the pressure washer over to my parents’ house and washed their brick pathway, which went from a blackish greenish shade to actually brick-colored. It was highly impressive.

In this photo, the right-hand wall has been washed. The left wall has not.
Pressure washing
Then it rained every weekend for three months.

Finally we had a clear weekend, so we had to take off all the loose bricks and reattach them – most of them were loose because of failing mortar, so we chipped off the old mortar and re-laid them with fresh. A few could just be glued back into place, so that was the easier solution in a couple of cases. There’s also one large crack (my wall is very slowly falling over, a process which I hope will take several more years) that we filled with mortar as well, just so the grass and liriope will stop trying to grow through it.

My dad and I are very focused on mortaring.
IMG_0612

Then I went on vacation, and it rained some more.

This weekend it was clear! I went around and filled all the hairline cracks with concrete patch. Then it was time to prime – 1.5 gallons of Kilz and 3 hours later, I was thoroughly coated in primer and so was the wall. Today I top coated the entire wall with masonry paint, and called it done. The worst bit was painting near the liriope – evidently all the crickets live in the liriope, and they were certain I was coming to get them, so they’d randomly pop out of the plants to escape me. Except they tended to jump straight towards me, which meant I’d flail backwards, trying to get them off me, and they’d go leaping off somewhere else, only for another cricket to repeat the whole sequence a minute later. But the wall is painted, and it looks pretty awesome, if I do say so myself (and I do, after seeing the “before” shot from pressure-washing!).
Finished Wall!

Painting a front door

This winter, I re-weatherstripped my front door. This involved prying off all of the old weatherstripping that had been painted over several times, fixing the threshold, and installing new weatherstripping. That part was fairly straightforward, though I ended up repainting the doorframe in the process.

However, the old weatherstripping had attached to the door itself, so removing it had removed a lot of paint and left the edges of the door looking pretty bad. So I needed to repaint the door. It was painted white, over cream, but I decided that I’d like to do a more dramatic color instead. After some consideration, I narrowed down my options to a very dark purple that picks up the tone of the bricks, or the same turquoise that I have on,y living room wall. Since I wanted more brightness, I went with the turquoise.

The first step was scraping off the old paint. I discovered fairly quickly that the white paint was latex, while the cream paint underneath it was oil. This was a problem, because it meant the white paint chipped off a lot more than I had expected. After several weekends of scraping, I decided it was good enough, and took my power sander to all the flat surfaces to smooth them out. I also used wood filler to clean up the edges where the old weatherstripping had attached – tiny nail holes every couple inches around the entire door.

Once I’d prepared the surface by filling and then sanding, it was time to paint. I took all the door hardware off – I considered replacing it, but I’d been given a new door knocker that matched the existing brass handle and deadbolt, so it seemed unnecessary to change those. I also bought a peephole so I can see who’s on my porch without standing on my tiptoes to see out the windows.

I didn’t want to use oil paint, so I chose a primer that would go over oil but allow me to use latex paint. After a coat of that, I did two coats of exterior latex, using a brush for the narrow grooves and a mini roller for the large panels. This part was frustrating because I had to have the door open for nearly an entire day to do all the coats, and my cats were not pleased at being confined to the studio while I worked. But the paint went on beautifully, and dried quickly enough that I could shut the door that night without it sticking. Once it was dry, I reassembled all the door hardware, including reversing the deadbolt that’s been backward since the day I moved in! I also scraped all the excess paint off the windows – I decided it was easier to scrape them than to tape them in advance, and it worked fine.

So here’s my lovely, newly painted front door! Ignore the peeling paint on the porch floor, that’s a project for another day…

20130707-140311.jpg

Digging up my yard

I have a new goal this spring — care about my yard. I’ve been much more willing to fling myself into big indoor projects like redoing my kitchen or building furniture than paying any attention to that vaguely green area outside the walls. But with some serious help and encouragement from my mom, that’s changing. I’m starting fairly small – there’s a 9′ by 12′ area out front that’s bordered by the house, the walkway, and the driveway that would be a really nice flowerbed. It had some random hostas, liriope, and lots of crabgrass, plus a row of bushes to keep people from falling off the yard into the driveway (about a six foot drop). It also has a rose that insists on producing lovely pink flowers despite my total neglect.

So the first step in turning this zone into a flowerbed was digging everything up. We left the bushes and the rose, but after more discussion today, it looks like the rose will need to go too, despite its awesomeness, because it’s in a really awkward spot. Anyway, last Saturday we spent a couple hours digging everything out, and marveling at the vast number of earthworms in my yard. Today, we started the very tedious process of sifting all the dirt to get random bulbs, rocks, and roots out of it. I also took on a tiny triangle to the right of the path, which used to be full of random grass, and today I dug it all out.

Turns out digging up a flowerbed involves finding strange objects… like a railroad spike, a Spirograph wheel, a beer bottle, a plastic washer, the biggest earthworm ever (no seriously, I’m talking seven inches long, the thing was like a snake), and speaking of snakes, two six-inch long brown snakes, which I’ve discovered by Internet were probably either worm snakes or earth snakes- both totally harmless, and interestingly, live on earthworms. Tasty.

So there’s a lot more sifting in my future, and then we get to do the fun part, picking plants! I’ll try to actually take pictures for the next few steps.