So, last I posted, I had big plans for a corner tv stand. Well, really, I had an idea that I wanted a corner tv stand, and that was about it. But instead of going ahead and building a tv stand, I decided I really wanted to turn the man-cave into my wood workshop first. (Yes, no project in this house is ever just one project, it’s always got something else that needs doing first.) My workbench has been in a corner of the basement for the past couple years, which was fine except that every time I cut wood or sanded anything, I got sawdust everywhere, including on my laundry. So confining the woodworking to a separate space before I built a large piece of furniture seemed worthwhile.
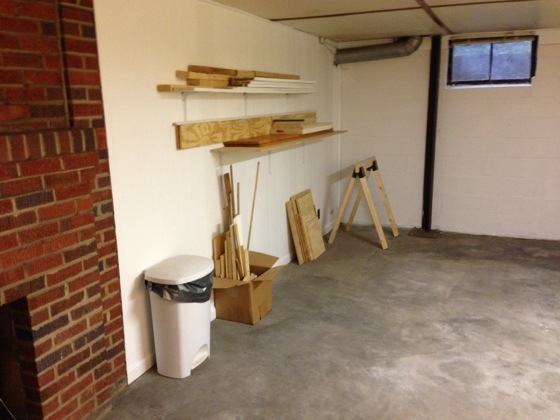
First I had to clean the man-cave. I swept out the whole room, scrubbed the walls, and the floor, and finally figured out why there’s an awl sticking out of the window frame of the one window in there – it’s holding the window closed. Hmmm. I also decided to paint over all the fake wood paneling that’s on the two walls that aren’t cinderblock, and repaint the cinderblock, since the scrubbing only helped a bit with its looks. After a solid coat of Kilz primer, I painted the entire room white, which actually made a great difference in how dark and icky the room seemed.
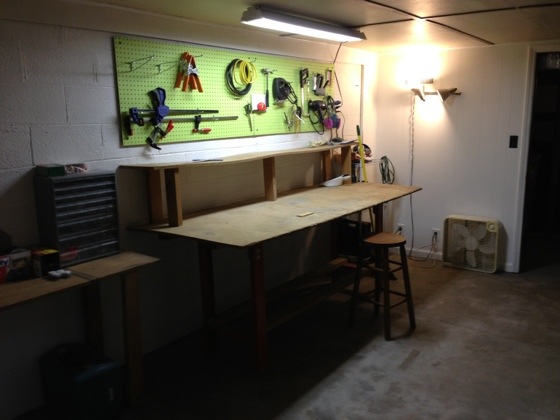
Then I bought two big sheets of pegboard for tool storage, and painted them bright green – the same color as my studio wall upstairs. I used a tiny roller so I didn’t clog up any of the peg holes, which worked really well. Then I hung the pegboard on one of the cinderblock walls, just above where my workbench would end up. (Tapcon screws are awesome for this kind of thing!) I had leftover wire shelving from a previous pantry, so I built it into a small shelf unit for things that won’t go on the pegboard, and I bought big heavy-duty shelf brackets to use on the opposite wall as lumber storage. My basement gets wet pretty rarely, but it’s enough that any wood supplies need to be off the floor lest they get damp.
At this point, I needed to move the actual workbench into the man-cave, so I called my dad. This workbench is eight feet long, with power outlets on the legs, and a solid slab of MDF as the top, plus a shelf the full length of the bench (made from not-very-thick MDF, so it’s very wavy, but it still works). So I got my dad to come over to help me move my workbench into place, and then discovered… it wouldn’t go through the door. Oops. So we spent half an hour taking the workbench apart, and moved it into the right room in pieces. Then I got to reassemble it, and added an extra bracing piece which makes it way sturdier than it ever used to be. So that was actually an unexpected improvement.
And now I have an actual wood shop, where I can close the door and keep from covering the entire basement in sawdust when sanding. It’s pretty great!