So I thought about the banquette occasionally for more than a month, always stalling out on the need to call an electrician and get the outlets moved. And then I realized that I didn’t actually have to move the outlets – I could just remove them. And that’s something I felt pretty confident I could do.
First step to any electrical job – turn off the breaker. In this case, right after doing that, make sure the refrigerator isn’t on the same circuit, because that would mean I had to work fast. Turns out this circuit only has four outlets on it – the two that need removing, and the two counter-height ones to the left of the sink. Awesome.
Then I unscrewed the outlet covers, unscrewed the outlets, and unscrewed all the screws that held wires to the outlet. Then I went into the basement and pulled the wires down. Well, mostly. There was one that just would not come, so I abandoned it in the wall – there’s no electricity to it anymore, so it’ll just sit there until some future homeowner opens up the wall to do something.
Then I connected the wires in the basement so the circuit still carried electricity to the counter-height outlets, and put the connections into a junction box so they’re not exposed. Then I flipped the breaker on and checked the outlets to make sure they worked, and indeed they did.
Actually, I skipped over a step – when I’d made the first connection in the basement, I decided to test the circuit so I could fix it if I’d messed something up already. So I flipped the breaker on and clipped my circuit tester to the wires to see if the little light would light up. Except for how my circuit tester has a bit of metal like a pen clip on it that I was touching at the time. I got a pretty impressive buzz up my arm, and I dropped the tester really fast. At least I knew the circuit worked. I was a bit more cautious for the rest of the electrical process, too.
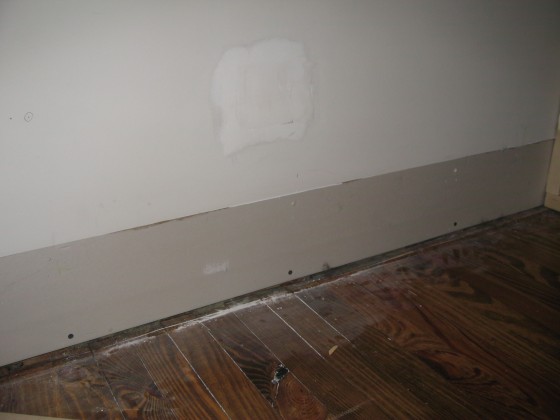
Anyway, with the wires and outlets out, the final step was patching the holes – even though they’ll be behind the banquette, it just seemed wrong to leave the gaps open. This is what the wall looked like after patching (I didn’t bother repainting – I’ll do whatever touchups are needed when I’m painting the banquette):
I also took the baseboards off so I could butt the boards right up against the wall, which is why the wall changes color right there. Conveniently, that also exposed the sheetrock screws – telling me where all the studs are.

