Fixing details, building a coat rack.

When I redid the kitchen, there were a couple of things I just didn’t think about – I hadn’t really considered whether having a phone jack where there had always been a phone jack made any sense, since I don’t use a landline. I also ended up removing two wall outlets, because I built a banquette seat over them. But that phone jack has just stayed on the wall, empty and useless, for two years now. So I figured, maybe it’s time to remove that. And while I was going to be patching wall, maybe I should fix the outlet in the living room, and take out the phone jack that’s attached to a baseboard in there, and maybe even move the coat hook rail that’s placed in such a way that it covers up a lightswitch, leading guests to have no idea how to turn off the living room light. Don’t you love project creep? My one little phone jack removal suddenly became four different little projects. But that was fine – at least I’d only have to get the wall paint out once.

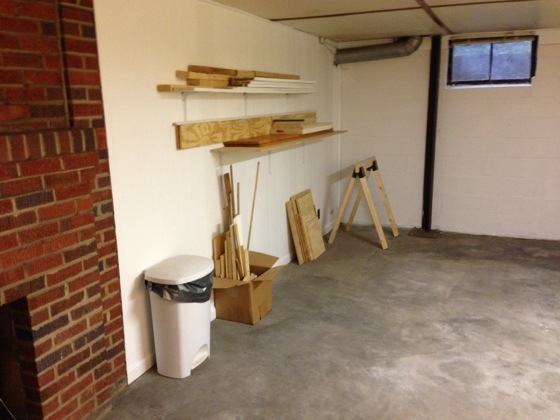
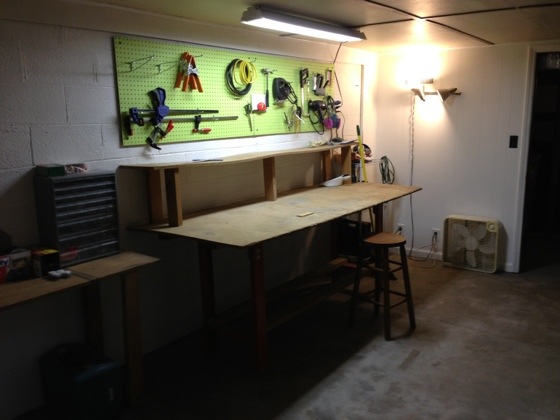
So I took out the phone jacks, and replaced the outlet, and took down the coat hook rail, and patched all the holes. And then I went to put the coat hook rail up in a new spot, and realized that the 4-hook rail I had looked kind of puny in the new place. I figured a bigger one in the same style probably existed, so I’d just go buy that. What I had was dark wood with dark bronze hooks, which I liked well enough. But after visiting three different stores, all I could find in the store were white with white hooks, dark wood with chrome hooks, or white with bronze or chrome hooks. (If you had asked me before yesterday if I cared about the finish colors on my coat rack, I would have laughed at you. Now I suddenly have very strong opinions.) BUT! Home Depot had individual hooks, including nice dark bronze ones. And I have a lot of scrap wood and a lovely clean workbench. So I bought five hooks and brought them home, and spent a couple hours cutting a piece of wood to the right size, sanding the old varnish off it, routing the edges, and staining it. Of course, then the stain needed to dry, so I had to wait a day to seal it with polyurethane.

In the meantime, I painted all the spackled spots where I’d fixed holes in the walls, which look great. The next day, I was going to poly my coat hook rail… but it turned out my poly container didn’t get closed fully the last time I used it, so it was a solid instead of a liquid. Oops. That provoked another trip to the home improvement store – luckily, I also decided to test out one of the hooks to see how it would look on the rail, and discovered that I had to buy shorter screws as well, since the ones that came with the hooks were too long – they’d go all the way through the rail, not just into it. Unhelpful! One trip to Lowe’s later, I had liquid poly and screws of the correct length. So after sealing the rail and installing the hooks, I could hang the coat rack on the wall, and hang all my coats back up. This whole project was the kind of thing that no one else will ever notice, but makes me happier with my house in general.

Opera tech week

So, a week before opening night, we had our first rehearsal in the actual theater. The first thing we got to do was walk the stage – it’s a raked stage, which means it’s tilted so the back’s higher than the front. It’s great, visually, because you can have characters waaaaay upstage and still be able to see them, because the downstage people are literally downhill, not blocking sight lines. It’s not so great as an actor, because you spend your entire time on stage walking on a hill – not the simplest of tasks, particularly in heels! So we all got a few minutes to walk through our blocking while wearing our show shoes and petticoats (managing a floor-length skirt is not trivial!).

Then we did a run-through, discovering all the parts where climbing stairs takes longer than walking across taped-off lines, or where the space we used to stand was just a bit too close to the eight-foot drop to the orchestra pit. The tech people were working on their parts, too – but what they were working on rarely lined up with what we were working on, so the lights would be set for an entirely different part of the act, and the spotlights were totally unrelated to where the principals were standing. There was a point in the middle of the second act where I was in a spotlight for a few seconds, which was pretty disconcerting – like, “no, don’t look at me, I’m in the chorus!!!” There were also a few funny moments with the stage – we dropped an apple, which then rolled downstage and off, provoking our stage director to tell us “just don’t drop the apple!” which we thought was kind of unhelpful. There’s also a point where the tenor flings a stool over in a rage, and the stool started rolling downstage, so they tested several ways to throw the stool, which resulted in at least one run-through where he was raging around, then veeeery gently tipped the stool over, and went back to raging. Not so effective. By Monday, the stool was a rectangular one that wouldn’t roll.

Sunday was the sitzprobe, a word we’ve borrowed from the German, that’s the first time the singers and the orchestra come together. There’s no staging at this, just whoever needs to be onstage at any given moment. Hearing all the music with the orchestra for the first time was amazing, and it was kind of nice to have our director stopping not because of something we’d done, but because the brass needed to be louder, or the strings missed a rhythm.

Monday was our first dress rehearsal – half-dress, really, since we wore our costumes, but didn’t do hair or makeup, and we didn’t have the orchestra. This was when I discovered how hard it is to walk up stairs while carrying a tray and dealing with floor-length skirts and a petticoat. I was not the only one with this problem, provoking an actual, not-even-kidding, “skirt tutorial” with our wardrobe mistress. Yup, we had to be taught how to keep from falling on our faces with the skirts. It helped, though!

Tuesday was full dress rehearsal, which was when I discovered that part of wearing a wig with very short hair is getting your hairline glued back. Like, with an actual glue-stick. Luckily, glue-stick glue is water-soluble, but let me just note, if I ever need to spike my hair really well, I know what to use. I got a lovely auburn wig with a very silly hat. It has been a long time since I’ve had to deal with getting flyaway hair in my mouth, and I do not miss it even a little bit.

We had three hair/makeup experts, so to get your wig on, you’d bring your hat from the dressing room, find the head with your name and wig on it, and get in line – since all our principals had wigs, plus many of the male chorus (some of them got facial hair, too!), and most of the women, the line could get long, so choosing your time was an art. Once it was your turn, you’d hand off the wig head to the makeup person, get glued and pinned and properly attached, then shake your head to confirm that everything was secure – and if something slipped, it would get thoroughly pinned down, since no one wants a hat or wig to fly off mid-scene.

The full dress rehearsal on Tuesday went pretty well, though I think that was the night that our director decided that his assistant was going to run the women through our fast section every night, just to make it that much more likely for us to do it right – he didn’t stop us during our scene, but it wasn’t particularly on-tempo. The men did get stopped several times for one of their choruses, where there was a lot of on-stage action distracting them from actually singing. Whoops.

Wednesday was the final dress rehearsal, also known as student night, because local middle- and high-schoolers can come for $5. We had a pretty good-sized audience, which was great – hearing their reactions and energy made a real difference. We had a few minor bobbles during the run-through – someone tripped coming down the stairs and dropped a bolt of cloth, and one of the entrances took longer than it really had time for, but nothing major.

Then we had Thursday off, and performances started on Friday!

Joining the Opera

This fall, I’ve been doing something entirely new to me. On the suggestion of a fellow choir member, I auditioned for the local Opera Chorus. You know all those people in the opera, not the stars, no, the peasants or townsfolk or sailors or whoever, that make all the background stuff happen, who react to the actions of the principal characters? Yup, that’s what I’m doing.

Just getting the audition was an adventure – my fellow chorister had given my name to the director in the middle of the summer, but I hadn’t heard from him. So when she got the rehearsal schedule, she checked with him again – but still, I heard nothing. Then she gave me the opera manager’s contact info so I could check with him. Still, nothing. They had their first rehearsal – yes, the director needed more people, wanted to talk to me. I heard nothing. Finally, an email! We set up a time to meet. I got strep throat and had to cancel. Rescheduled for the next week, right before the third rehearsal.

On the way to this audition, I had a huge mental fight with myself. Why was I doing this? I don’t know any opera! I haven’t even acted! Well, okay I did that one musical in college, the one my friend wrote. But this? Not a casual college musical! Real opera! With audiences who actually pay to come! Exactly why did I think this was a good idea? Luckily, I was already on my way to the audition at this point, so I couldn’t back down.

The audition was very casual, which was great for me because remember, I don’t actually know any opera repertoire. The last singing group I auditioned for was during my first year of college, and I think I sang Non Nobis, a cappella, for that. Not quite what you’re looking for with opera. But despite my lack of operatic knowledge, the director seems to have found me acceptable, because he invited me to join! Well, actually, he invited me to that third rehearsal, with the escape clause that I could run away screaming if it didn’t seem like what I wanted. But that rehearsal was great, and only cemented that this was going to be an amazing experience.

I’d already missed two music rehearsals, but I caught up quickly – it’s always easier to learn a part when someone next to you is singing it correctly. We started with weekly music rehearsals, which felt very comfortable for me – I’ve been in enough choirs that learning music is something I’m used to. Lots of work on German pronunciation – euch, auch, für, ich, nicht… all sorts of notes on closed versus open vowels, not eliding our consonants, and keeping our Southern diphthongs out of the mess!

Also, there’s a passage in the women’s chorus that’s marked “Presto possibile” – literally “as fast as possible”. And it is ridiculously fast, with German consonants flying every which way. We were happy just to survive it the first time, the second time we actually all ended together, and the third time I may have said half the words correctly. Memorizing it was a matter of going over it again and again. And again. And then another time. You’d make it through cleanly once, and then the next time trip over your tongue and lose an entire chunk of it.

Then staging rehearsals started. These are held in what used to be a gym, now with tape on the floors to show where the stage is and the stairs/entrances marked. Getting everyone where they need to be can be tedious, and blocking is a continuous puzzle of traffic jams and planned interactions. I actually missed the first two staging rehearsals because of the juggling festival and then a book club, so when I got there for the first time, they’d already blocked all of Act II. Which meant I got assigned to a group, and I pretty much follow what they do – all while singing, of course. It requires a ton of situational awareness – where are other people on stage, where am I going, am I facing upstage (don’t do this when you’re singing!), am I blocking anyone else, who am I interacting with, is my body language right for the scene (even more difficult, since you’re reacting to things people sing… in German, so you’re either frantically translating in your head or just having to remember which reaction goes with which chunk of music…). I’ve never been great with kinesthetic stuff – knowing where I am in space – so it’s tough, but also really fun! Oh, and you’re not guaranteed to be anywhere near anyone else on your part, so you better have it well memorized. Most people make index cards for staging – just the words to your parts, and you can write down some stage directions to help jog your memory when you’re standing there trying to remember what comes next.

Also, this is professional theater. Which means we have a stage manager. And two assistant stage managers! They help run rehearsals, give us our cues, keep the room quiet when staging is happening (it’s pretty common to end up chatting while the director is working out a problem on the other side of the stage… and with 36 people in the room, it can get loud), and generally keep everyone on task. It’s amazing. And costumes! I went for my fitting last weekend, and that costume is going to fit me better than my actual clothes do – they did rough measurements weeks ago, and the fitting makes it tailored exactly to me. It’s also going to be incredibly warm – long-sleeved, full-length wool dress, plus an apron, hat, and shawl. Not looking forward to that part so much, but it’s part of the whole experience, I suppose.

Next post – tech week and what happens when you go from a gym to the actual stage!

Asheville Juggling Festival

So this was my third year at the Asheville juggling festival. Previous years I’ve gone just for the Saturday – a group of us drove up early in the morning and headed back home after the evening show, which makes for a very long day. This year I decided to stay over the Saturday night to get some juggling time on Sunday, as well as getting to stay longer on Saturday night.

Continue reading

Driveway wall repair and painting

I haven’t done a ton to the house this summer, hence the massive lack of updates. But there is one major project that I just finished. My driveway wall has been looking a bit worse for wear – cracks, water/mud stains, a few loose blocks, and lots of chipping and peeling paint. So this summer, I finally tackled it , with lots of parental assistance. First I rented a pressure washer to clean the whole thing thoroughly. It took a couple hours to wash the entire wall, but it was incredibly satisfying to see it get clean. We also took the pressure washer over to my parents’ house and washed their brick pathway, which went from a blackish greenish shade to actually brick-colored. It was highly impressive.

In this photo, the right-hand wall has been washed. The left wall has not.
Pressure washing
Then it rained every weekend for three months.

Finally we had a clear weekend, so we had to take off all the loose bricks and reattach them – most of them were loose because of failing mortar, so we chipped off the old mortar and re-laid them with fresh. A few could just be glued back into place, so that was the easier solution in a couple of cases. There’s also one large crack (my wall is very slowly falling over, a process which I hope will take several more years) that we filled with mortar as well, just so the grass and liriope will stop trying to grow through it.

My dad and I are very focused on mortaring.
IMG_0612

Then I went on vacation, and it rained some more.

This weekend it was clear! I went around and filled all the hairline cracks with concrete patch. Then it was time to prime – 1.5 gallons of Kilz and 3 hours later, I was thoroughly coated in primer and so was the wall. Today I top coated the entire wall with masonry paint, and called it done. The worst bit was painting near the liriope – evidently all the crickets live in the liriope, and they were certain I was coming to get them, so they’d randomly pop out of the plants to escape me. Except they tended to jump straight towards me, which meant I’d flail backwards, trying to get them off me, and they’d go leaping off somewhere else, only for another cricket to repeat the whole sequence a minute later. But the wall is painted, and it looks pretty awesome, if I do say so myself (and I do, after seeing the “before” shot from pressure-washing!).
Finished Wall!

Painting a front door

This winter, I re-weatherstripped my front door. This involved prying off all of the old weatherstripping that had been painted over several times, fixing the threshold, and installing new weatherstripping. That part was fairly straightforward, though I ended up repainting the doorframe in the process.

However, the old weatherstripping had attached to the door itself, so removing it had removed a lot of paint and left the edges of the door looking pretty bad. So I needed to repaint the door. It was painted white, over cream, but I decided that I’d like to do a more dramatic color instead. After some consideration, I narrowed down my options to a very dark purple that picks up the tone of the bricks, or the same turquoise that I have on,y living room wall. Since I wanted more brightness, I went with the turquoise.

The first step was scraping off the old paint. I discovered fairly quickly that the white paint was latex, while the cream paint underneath it was oil. This was a problem, because it meant the white paint chipped off a lot more than I had expected. After several weekends of scraping, I decided it was good enough, and took my power sander to all the flat surfaces to smooth them out. I also used wood filler to clean up the edges where the old weatherstripping had attached – tiny nail holes every couple inches around the entire door.

Once I’d prepared the surface by filling and then sanding, it was time to paint. I took all the door hardware off – I considered replacing it, but I’d been given a new door knocker that matched the existing brass handle and deadbolt, so it seemed unnecessary to change those. I also bought a peephole so I can see who’s on my porch without standing on my tiptoes to see out the windows.

I didn’t want to use oil paint, so I chose a primer that would go over oil but allow me to use latex paint. After a coat of that, I did two coats of exterior latex, using a brush for the narrow grooves and a mini roller for the large panels. This part was frustrating because I had to have the door open for nearly an entire day to do all the coats, and my cats were not pleased at being confined to the studio while I worked. But the paint went on beautifully, and dried quickly enough that I could shut the door that night without it sticking. Once it was dry, I reassembled all the door hardware, including reversing the deadbolt that’s been backward since the day I moved in! I also scraped all the excess paint off the windows – I decided it was easier to scrape them than to tape them in advance, and it worked fine.

So here’s my lovely, newly painted front door! Ignore the peeling paint on the porch floor, that’s a project for another day…

20130707-140311.jpg

Corner TV Table

So, now the project that I delayed in order to make an actual wood workshop: the tv table!

My current tv table looks like this:
20130224-175943.jpg

Too small for the tv, wedged awkwardly into the corner despite not being a corner table, and my stereo speakers don’t fit inside it (and even if they did, I’d have to open the glass doors to hear them). Clearly this is no longer the right piece of furniture.

So I designed my own corner tv stand – it’s based off the previous tv stand, with some important tweaks. First, it’s a corner tv stand instead of a rectangle. It’s sized so it’s wide enough for the tv, but doesn’t block the baseboard vent to the right of the stand. It’s wide enough to hold my stereo and its speakers. It doesn’t have doors on the bottom section, so I can use my stereo without having to open doors. It also has two shelves for the Tivo, Wii, DVD player, and their accessories. Continue reading

Basement workshop

So, last I posted, I had big plans for a corner tv stand. Well, really, I had an idea that I wanted a corner tv stand, and that was about it. But instead of going ahead and building a tv stand, I decided I really wanted to turn the man-cave into my wood workshop first. (Yes, no project in this house is ever just one project, it’s always got something else that needs doing first.) My workbench has been in a corner of the basement for the past couple years, which was fine except that every time I cut wood or sanded anything, I got sawdust everywhere, including on my laundry. So confining the woodworking to a separate space before I built a large piece of furniture seemed worthwhile.

First I had to clean the man-cave. I swept out the whole room, scrubbed the walls, and the floor, and finally figured out why there’s an awl sticking out of the window frame of the one window in there – it’s holding the window closed. Hmmm. I also decided to paint over all the fake wood paneling that’s on the two walls that aren’t cinderblock, and repaint the cinderblock, since the scrubbing only helped a bit with its looks. After a solid coat of Kilz primer, I painted the entire room white, which actually made a great difference in how dark and icky the room seemed.

Then I bought two big sheets of pegboard for tool storage, and painted them bright green – the same color as my studio wall upstairs. I used a tiny roller so I didn’t clog up any of the peg holes, which worked really well. Then I hung the pegboard on one of the cinderblock walls, just above where my workbench would end up. (Tapcon screws are awesome for this kind of thing!) I had leftover wire shelving from a previous pantry, so I built it into a small shelf unit for things that won’t go on the pegboard, and I bought big heavy-duty shelf brackets to use on the opposite wall as lumber storage. My basement gets wet pretty rarely, but it’s enough that any wood supplies need to be off the floor lest they get damp.

20130219-211952.jpg

At this point, I needed to move the actual workbench into the man-cave, so I called my dad. This workbench is eight feet long, with power outlets on the legs, and a solid slab of MDF as the top, plus a shelf the full length of the bench (made from not-very-thick MDF, so it’s very wavy, but it still works). So I got my dad to come over to help me move my workbench into place, and then discovered… it wouldn’t go through the door. Oops. So we spent half an hour taking the workbench apart, and moved it into the right room in pieces. Then I got to reassemble it, and added an extra bracing piece which makes it way sturdier than it ever used to be. So that was actually an unexpected improvement.

20130219-211415.jpg

And now I have an actual wood shop, where I can close the door and keep from covering the entire basement in sawdust when sanding. It’s pretty great!

New tv, new projects

I don’t watch a ton of television, so I’ve had a 20″ CRT since college, which has done well by me for that entire time. But when playing Donkey Kong Country earlier this year, I ended up sitting on my coffee table to get close enough to play effectively. That was the push I’d needed to start considering a bigger tv, and then I got a quick freelance job that gave me a bit of “extra” cash to spend. With flat-screen LCDs getting less expensive, I started researching options, and ended up with the LG 42CS570 – not one of the newer smart tvs with internet and all of that, but a good, basic, widescreen tv. You guys, it’s so big. And so shiny. And it weighs less than my previous tv, despite being twice as wide. I’m actually really glad they give you a way to screw it into your tv stand, because I might worry the cats would knock it over.

Anyway, as we know, any new acquisition in my house will somehow become a project – and the tv is no exception; in fact, it’s two projects! Number one: move the antenna into the attic so there are no rabbit ears distracting from my shiny shiny tv. Number two – build a corner tv stand so it looks like it belongs in my living room.

Antenna-moving happened last week – the plan was to stick the antenna in the attic, drop the cable from the attic through the wall, and install a cable connector plate on the wall so all that you see is a nice clean coax connector. Preferably really close to the corner so the tv stand will cover it. This… is actually what happened, but it’s never as simple as it sounds, is it? Continue reading

My garden grows!

It grows mostly without intervention from me, which is good, because I’m not spending a lot of time on it. I did water pretty regularly for the first few weeks, but since then we’ve had rain regularly enough that I’ve only had to water a couple times. Weeding has been the thing I really needed to do, because all the plants grow, not just the ones I put there – random sprouts of grass, oak trees, and other uninvited greenery keeps popping up. So I spend an hour or so weeding every couple weeks to discourage all the volunteers. Weeding is way easier than it was when I was a kid – I never knew what to pull up and what to leave, whereas now I know exactly what I planted, and anything I didn’t plant gets yanked out. The melampodium are really happy – they’re flowering all over with bright yellow daisy-like blooms. Something’s eating the leaves of my vinca, but they persist nevertheless in making happy white, purple, and pink flowers, too. The hostas are blooming right now, too, which are funny – they send up these really tall shoots that bloom with lavender petals way up above the leafy body of the plant.

This is what my flowerbed looked like right after I planted it:
Garden in April

And this is what it looks like now:
Garden in June

My herbs are mostly happy, too – well, actually, they’re all happy except for the dill, which disappeared two days after I planted – something ate the plant, and then dug up the roots and ate those – I went out to water and found a little hole where my dill had once been. But the basil got up to nearly three feet tall before I decided to make pesto, and even that used less than half the plant. The lavender and rosemary don’t really get used much, but they smell nice when you walk by- I tend to pet them and have my hands smell nice for a while.

Yay for growing things!