Digging up my yard

I have a new goal this spring — care about my yard. I’ve been much more willing to fling myself into big indoor projects like redoing my kitchen or building furniture than paying any attention to that vaguely green area outside the walls. But with some serious help and encouragement from my mom, that’s changing. I’m starting fairly small – there’s a 9′ by 12′ area out front that’s bordered by the house, the walkway, and the driveway that would be a really nice flowerbed. It had some random hostas, liriope, and lots of crabgrass, plus a row of bushes to keep people from falling off the yard into the driveway (about a six foot drop). It also has a rose that insists on producing lovely pink flowers despite my total neglect.

So the first step in turning this zone into a flowerbed was digging everything up. We left the bushes and the rose, but after more discussion today, it looks like the rose will need to go too, despite its awesomeness, because it’s in a really awkward spot. Anyway, last Saturday we spent a couple hours digging everything out, and marveling at the vast number of earthworms in my yard. Today, we started the very tedious process of sifting all the dirt to get random bulbs, rocks, and roots out of it. I also took on a tiny triangle to the right of the path, which used to be full of random grass, and today I dug it all out.

Turns out digging up a flowerbed involves finding strange objects… like a railroad spike, a Spirograph wheel, a beer bottle, a plastic washer, the biggest earthworm ever (no seriously, I’m talking seven inches long, the thing was like a snake), and speaking of snakes, two six-inch long brown snakes, which I’ve discovered by Internet were probably either worm snakes or earth snakes- both totally harmless, and interestingly, live on earthworms. Tasty.

So there’s a lot more sifting in my future, and then we get to do the fun part, picking plants! I’ll try to actually take pictures for the next few steps.

Kitchen clock

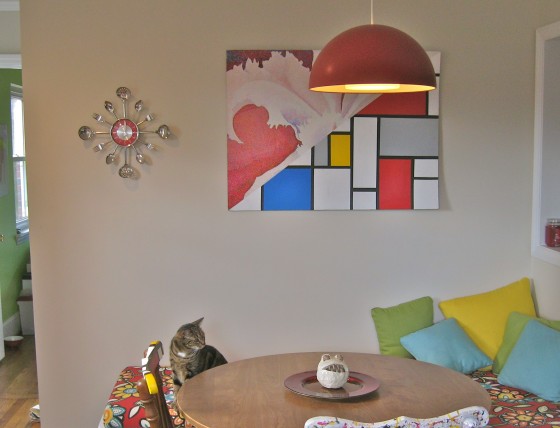
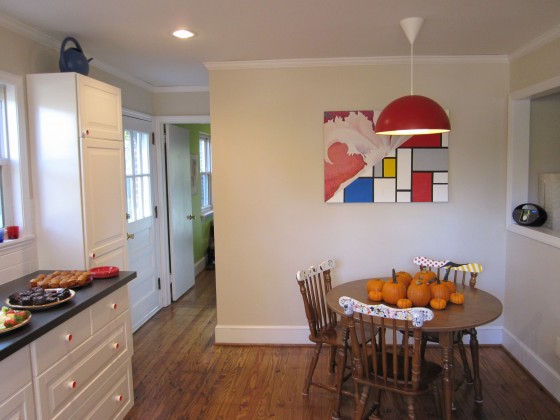
The back wall of the kitchen has been looking a little lopsided for a while, with a big piece of art on it that’s centered to the table, not the wall:

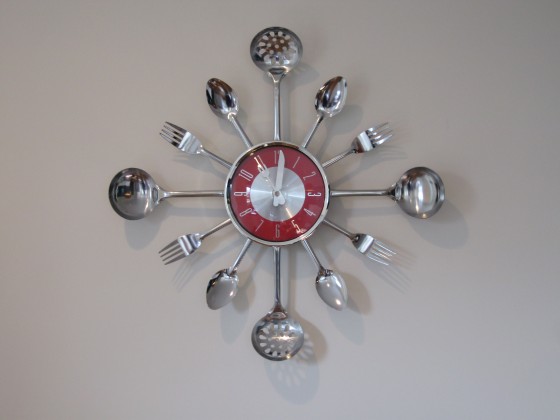
That’s because I’ve been saving the space to the left of it for a clock. But I hadn’t found one I liked, so I outsourced the problem to my family by asking for a red kitchen clock for Christmas. And that is exactly what I got from my eldest sister:

It even has a fork and knife as the minute and hour hands! Totally awesome. And it takes up that blank spot on the wall perfectly:

And there’s Dante, photobombing my shots as usual. Anyway, that’s my most recent tiny update to the kitchen.

Inexpensive flat files

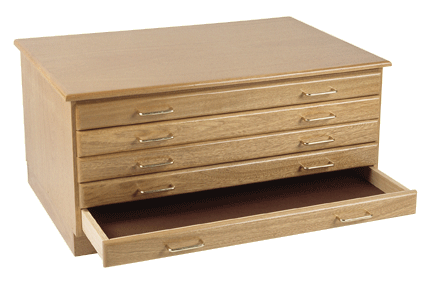
I have a lot of art. This is what happens when you’re an art major – you end up with a lot of art, and not enough time/space/money to hang it all on the walls. Which means I have 3 separate portfolios full of pieces that I want to keep, but don’t have room for. And most of it’s on paper, which mean storing it flat is the optimal solution. So I started looking for flat files – things like this:

Flat file

That beautiful 5-drawer flat file? Costs nearly $700 dollars. A metal version costs more. I do not have $700 to spend on flat files.
Continue reading

Screenprinting

I’ve been very quiet, but it’s not because I haven’t been doing anything – though the house is fairly stalled at the moment. I got distracted, see, because I wanted to design a t-shirt. And that’s all fine and good, but once you design the t-shirt, then you have to print it, and if you’ve ever read “If You Give A Mouse A Cookie” you have an idea how this is going to go.
Continue reading

banquette complete!

This is going to be the short version because I have to pack tonight, but: the banquette’s done!

I painted the whole thing – primer and two coats of the same paint that’s on all the wood trim in the house. Then installed shoe molding, and caulked the gaps where stuff didn’t quite meet perfectly.

Continue reading

banquette structure

So the last post had the basic frame and sides of the banquette built – now I just had to cover the sides and put the tops on. It turns out I did this in the wrong order – I should’ve attached the tops first, because then I could’ve screwed it in from below, hiding all those screwheads. Luckily, I’m painting the whole thing, so I’ll just spackle over them all. Anyway, I cut the right-hand section to size, sanded down the front edge so it’s a nice smooth curve instead of a sharp edge, and screwed it in. That was the simple side. Continue reading

building the banquette frame

Having eliminated the pesky electrical outlets, it was time to start building. I started by screwing a 2×4 into the studs at 15″ high – this’ll support the top, and gave me a level line to match, since my floor is definitely not level. I’d already created a drawer box, so I screwed that to the 2×4, with a scrap piece left over from the kitchen to make the spacing come out right. Then I just created a front frame with two long 2x4s and 3 shorter ones, which I screwed to the perpendicular wall and the drawer box’s other side. This is hard to explain in words – let me sum up with a photo: Continue reading

removing electrical outlets

So I thought about the banquette occasionally for more than a month, always stalling out on the need to call an electrician and get the outlets moved. And then I realized that I didn’t actually have to move the outlets – I could just remove them. And that’s something I felt pretty confident I could do. Continue reading

building a banquette

Way back when I was designing the kitchen, I thought it would be cool to have a banquette seat in the corner where the table is. I really like booth seats in restaurants, and my parents have a long banquette seat in their kitchen that works really well. Also, banquettes take up less space than chairs, since you don’t have to leave space to slide them back – and space is something I haven’t got a ton of in the kitchen. Continue reading

desk refinished!

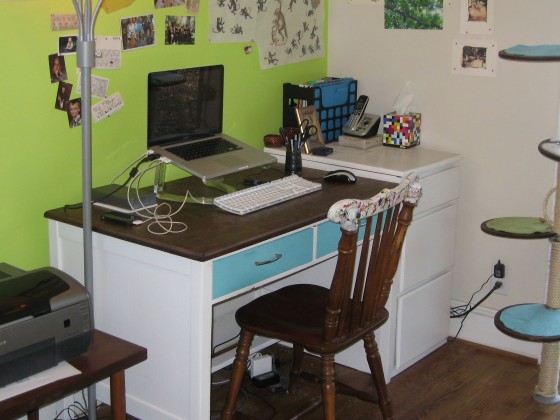
Here is the much-delayed final result of the desk refinishing project – it’s been done and in use for more than a month now, and is holding up perfectly, as well as being much easier to clean than the painted top was.

It even goes with my dining chair, with the half painted/half wood look happening. Maybe I should replace the lid of my art drawers, too (the ones to the right of the desk).